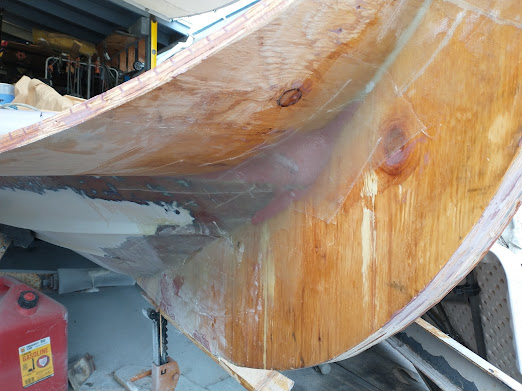
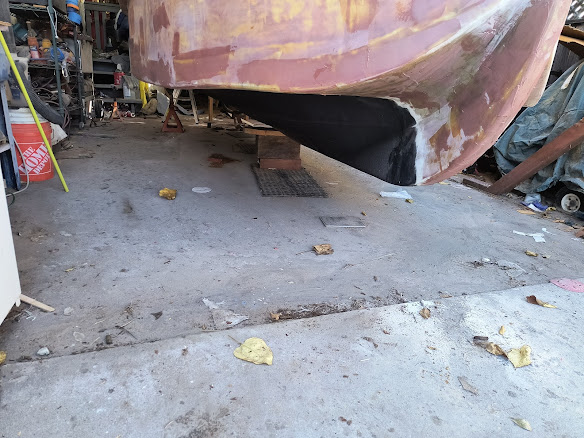
Rolled on the bottom primer. I used Sea Hawk Tuff Stuff primer. It is a 2-part primer that provides an additional water-proofing layer. I have 1/2 gallon left that I will use up to the water-line once the sides are installed. This primer is THICK!!! I will use the Sea Hawk 2053 Thinner for the next run. This primer does seem to appear to provide a nice hard surface. When the bottom paint arrives, I will sand the primer smooth then paint the bottom black. Once I can get the bottom painted, I will then FINALLY be able to flip the bottom hull right side up and start to build up the sides. Can't wait :)
You will notice that I did not apply the primer all the way to the edge. When I apply the fiberglass to the walls, I will wrap the fiberglass around the lower edges onto the existing fiberglass on the bottom.

While I wait for the bottom paint to arrive, I decided that this would be a great time to tackle the trailer. If I am going to put so much time to make the boat look pretty, I want it to sit on a pretty trailer. Everything is getting stripped off. I have all new suspension on the way as well. Currently, this trailer employs an odd slipper spring design. I don't like it. Besides, it appears that when the trailer was originally built, someone welded the rear slider bracket too far aft. With no weight on it, the edge of the spring "hook" is at the horizontal pin. As weight is placed on the trailer springs, the location gets worse. It apparently has worked all these years, but I just don't like it. Besides, these springs are rusty and the trailer sits VERY low which leads to the aft end of the trailer to scrape on the slightest of incline changes.
These rollers on the back of the trailer will be cut off.
Setting new fenders in place. They will be slightly lower that the originals and 1.5" wider on each side.
All sanded down to bare metal and 1 coat of Rustoleum Rusty Metal Primer.
YEAH!!! Time to flip the boat hull right side up!!!!
It is a bit scary suspending the boat from the ends to roll it over, but this system did seem to work quite well. A cable come-a-long on the stern and engine hoist on the bow.
Plans call for 1 90° jig to be placed at the rear cabin wall location to help hold the side wall skins in place. Since I stretched the boat 24", I made 2 - 90° jigs for each side. I can then clamp the skins to these jigs. Worked perfect.
First skin test fitted on starboard side.
Made another quick vertical jig to help hold everything vertical.
Both bow skins set in place.
Quick note here. The plans call for the side skins to be bonded and glassed together-- 12' long. In my case since I added 24", they would be 14' long. And that was my plan. A good friend of mine donated some Matrixx underlayment (Thanks Michael). These are 4'x5'. While test fitting the bow skins, I realized that it would be easier to set each skin panel individually. I screwed 2x4s and plywood planks at the seams to keep them perfectly flat as I went along. Doing this all solo, it worked out quite well. These Matrixx underlayment plywood are fantastic. The glue is waterproof. There are no voids in the laminate. Probably better that marine plywood.
Using straps to hold the plywood vertical.
OK, a little off topic here. I feel that it is important to keep the epoxy resin at a constant temperature. Found a free refrigerator (wasn't cooling very well). Installed a heating element inside along with a thermostat. Keeps the resin right at 72°-73°. The right side is temperature controlled. The left side is just normal storage to keep my supplies organized and clean.
Marking the curve lines onto the side wall skins. Tapping in these baby finishing nails to hold my 6' ruler in place.
Fun fact with these nails. My grandfather loved working with wood as a hobby. Right around 2003, He was no longer doing it and gave me a lot of his wood working tools and supplies. A little bottle of nails was included. For over 20 years, I have moved these with me, but never had any use for such tiny nails. Until NOW!!. They work perfectly to set these curves.
Nice and flush. Don't know why these pictures are a bit dark. I had the flash on.
Put a layer of epoxy filler into all of the voids.
Installing the aft lower panels. God bless ratchet straps :)
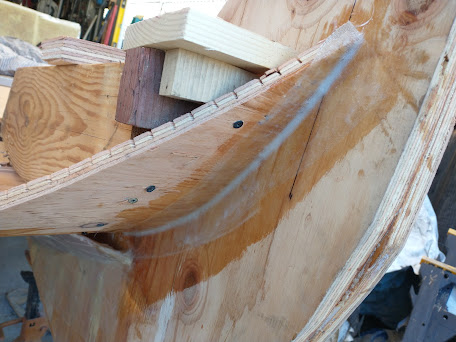
The bottom corner of the original v-hull protrudes slightly on the bottom. This will get a large fillet to blend in the 2 hull shapes.
I am waiting for more epoxy resin to arrive. So back to the boat trailer. Cleaned up the axle.
Wheel hubs were in horrible shape. Axle spindles look great though.
I was going to clean up the original hubs and replace the seals and bearing. Cost for the parts was around $50. I found some brand new galvanized hubs with the more conventional studs (vs using lug bolts -- of which I am not a fan) for $90/pair. So these went into the trash.
Now there is 2 coats of primer on the trailer and axle.
Finished off with 2 coats Rustoleum Gloss White Oil Based Enamel.
Pretty happy with the way it turned out. When I jump back on the trailer, I will install the new wiring and lighting.
Back to boat building. Installed the supports for the front deck and shelf
Ran out of plywood and funds. But I did have some 2x4s. Ripped them down to 2x2s, added some kerf cuts to make the radius, and bonded into place.
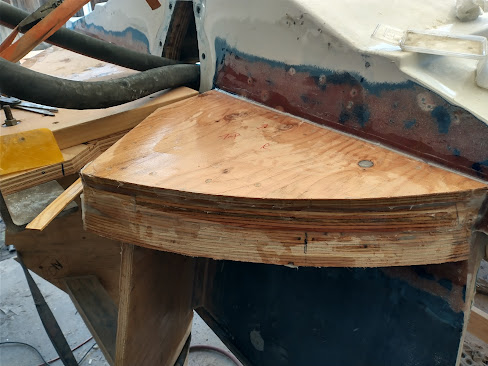
Cut and test fitted the deck and shelf pieces. Also cut out the access hatch sides. Currently the dimensions for the hatch sides that protrude into the cabin are larger that what the plans call for. Once I get the cabin walls built up and I get a better idea of how I want the controls to be set up, I will determine what the finished dimensions will be.
Aft rub rail fitted into place along with all of the side hull skins. Those that have built these cute little tugboats know the agony that I went through. All of the varying curves are quite the challenge. First rub rail piece didn't fit very well. OK fine -- not at all!! But now that it is installed, I am quite pleased. Starting to look like a tugboat hull now. Plans called for 4 layers of 1/2" plywood giving a total thickness of 2". I used 2 layers of 1-1/8" (1-1/16" true) underlayment plywood. This gave me a total thickness of 2-1/8". Just a tad thicker. I think that it was easier than getting 4 different layers to meld together.
used 6oz Fiberglass on top side of the deck and shelf pieces. I decided to increase the weight of the fiberglass from 6oz to 10oz. This will add a little bit more rigidity to the overall structure since the tugboat will have the ability to get up on plane with 130HP.
With the stern upper hull skins removed, I was able to fiberglass the inside of the stern lower skins to the original v-hull transom.
Small little hole will get filled and glassed in. The plans call for a temporary jig which sets the location of the rub rail, which it turn sets the shape for the stern hull skins. Since I am blending 2 hull shapes together, I needed to make some design changes. The floor which sets the shape of the tugboat planform is 2 individual pieces. 1 forward of the transom, and 1 aft of the transom. Instead of having 1 temporary jig in the center, I made 2 of them, rotated about 40 degrees and spread apart to clear the sterndrive. These parts are an integral part to the structure of the boat now. Tying the stern section to the transom.
June 2024
Busy, busy, busy.....
The side of the boat makes a great place to write notes and reminders.
Fit and bonded the forward rub rails. This was another one of those "not-so-fun" jobs. Multiple pieces that have to curve in and up, and all be held together 'with epoxy going everywhere!!!
Once the epoxy has fully cured, I can remove the screws and sand to the final shape.
So one final note on the rub rails and gunwale.....HOLY CRAP!!! For those that have built one of these, I am sure that you will agree. All of the curves are an absolute pain in the rear!!! For those that are thinking of building one, just be fore-warned, you will need to take some extra time and don't get too frustrated. Double check every measurement. If something moves even the smallest amount, walk around and double check all of the fitments. Make everything larger than you think it will need to be and then bring the parts down to their final size slowly. I still have some sanding to do to get the rub rail and gunwale down to the final shape. In the end, it is very rewarding to see it all come together.
A bit warm in the workshop lately.
Here are some close up shots of the gunwale and rub rails. Edges are routered. Filling and sanding all of the gaps to provide a nice smooth surface.
Time for a break. Threw a neighborhood block party BBQ for the 4th of July. Had a great time with some friends.
Wow, I guess that it has been a while since I have updated this. It is now September 1st. I had to take a week off of the boat project for the Central Coast Renaissance Festival. Then another 3 weeks to work on the Triumph Spitfire: Replace the entire wiring harness, all new gauges, half of the switches, fuel pump, replace both door handles, and learned how to install a windshield -- yippee. Then got back to the boat.
I laid down some fiberglass on to the aft stern upper skins. Then I made a recessed box for the rear tow hook. I could have just bonded a block to the inside of the skin and screwed a standard tow hook, but I really wanted something a little special here. Recessing it ended up giving it a really clean look. The boxed section is 1/2" plywood bonded to the skin and the 4x4 oak block that the will anchor the hook with through bolts, not just some screws.
This 4x4 oak block is bolted and bonded the the 3/4" transom support which is bonded and glassed to the transom and stern skins.
Lower ledge is sloped down about 5° to prevent any water from pooling inside the recess.
Now for some bling-bling: new massive bow-eye and the rear tow hook.
Setting the rear tow hook in place, I felt that it was recessed in too far.
Bonded and glassed in a 3" thick wood block to bring the tow hook out a bit more. I really am liking the look of this.
Here you can see the difference in size from a standard bow-eye, and the one that is going on the tug boat. The stem on the boat is 6" deep (versus the plans which called for 3.5" deep). This bow-eye is 8" long (5.5" past the mounting flange). So I will have to cut out a relief in the inside to provide room for the backing plate and nuts. No pictures of that yet.
Worked on fairing a nice fillet from the aft lower skin to the rear corners of the original v-hull bottom. Found a great use for those old incandescent light bulbs that we no longer use. Just the right size for a good fillet.
Fillet and radiused the front stem to the gunwale -- sorry for the blurry pic.
Sand - Fill - Sand - Fill - Sand --Rinse and Repeat. OMG -- my arms were killing me. There is now way to convey the amount of sanding that is required to get to the point of laying down the fiberglass. I could have just laid down the glass and fill any necessary voids later. However, I felt the the better that I could make the initial surface now, would mean a lot less work later.
Yeah!!! it's fiberglass time. Plans called for 1 layer of 6oz fiberglass. Due to the higher speeds and the lakes around here can get a bit rough, I increase the fiberglass by 40% -- 10oz.
I discovered a neat little trick. I use tacks to hold the glass in place while I applied the resin.
I trimmed of the lower half of the glass since my goal here was to cover from the top of the gunwale to the bottom of the rub rail. Later I will glass in the lower half to the top of the rub rail which will give me 2 layers of 10oz fiberglass around the rub rail.
Top half of the boat is now completely encased in 10oz fiberglass.
Time to lift the boat off of the stands, set it on the ground, and lean it over so that I can do the finish work on the lower half of the hull. Rear tow hook and bow-eye worked great as lifting points.
Lower chine routered with 3/4" bit. Still lots of sanding to do and fill any little voids to create a smooth bonding surface for the fiberglass.
Sanding, filling, sanding, filling -- Rinse and Repeat!!!
Finally time to lay down some more 10oz fiberglass. 1 layer over the side skins. overlapping over the rub rail for a total of 2 layers. 3 layers along the lower chine and the bow to stem joint.
There will be some trimming of glass hanging on the bottom, but I will wait on that for now.
Pretty happy with the way this little overhang turned out. This little section was a point of great contemplation. This little corner tip is part of the original v-hull of the Four Winns donor boat. I wanted to cut this tip off to allow for a continuous smooth round shape which defines the shape of a tugboat. As I weighed the pros & cons, my largest concern was how the boat would handle up on plane without those corner tips. Although looks are hyper-critical to this build for me, I also want a stable - comfortable ride. I felt that leaving these corner tips in place will add that stability. These will also not be seen once the boat is in the water. Once painted with the flat black bottom paint, most people probably won't even notice them. Well except for those of you who have taken the time to read this far down in this blog :)
October 25th 2024
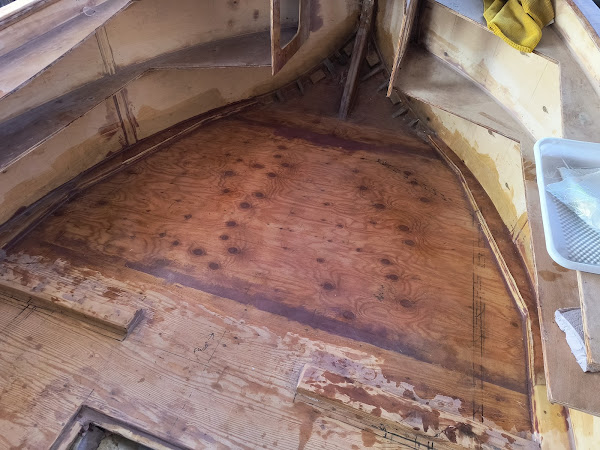
Time to shift gears here. My original plan was to finish the outside lower section of the hull (sand, primer, & paint) and then put the boat back onto the trailer. This would have been a great milestone. We are now at the end of October and rain will be on its way in the near future - albeit the weather has been beautiful this last month. The boat project is under cover; however, it is not completely shielded when a bad storm comes in. I don't want the floor to get wet and absorb any water. Spent some time filleting inside corners and router the outer edges. I also worked on filling any void in the plywood and joint/seams. Next will be to sand all this filler down smooth and get some fiberglass laid down on the floor. I will not worry about the walls at this time, just want to seal the floor.
1 layer 10 oz glass on the cabin floor.
Running out of hardener, so shifted to the port rear since that is where water can get blown in from the storm that is on its way. went from "running out" of hardener to OUT :(
Had to stop laying down fiberglass at this point.
Time to get the new bunks on the trailer.
November 2024
This trailer has come a long way from what it looked like 1 year ago!!
1 layer of filler to blend in the fiberglass overlap seams starboard side.
Found a bubble too big for my liking. This one section has been a pain in my ass! I have fixed it twice, and the glass just wont conform. I was hoping that I could get the glass to bond to the wood, and then I could fill in as necessary. NOPE!! Ground out the fiberglass.
Filled the low spot. I will sand perfectly flush and put 3 layers 10 oz glass over it.
Starboard side: after sanding down the seam filler, spread filler on entire surface to fill in the fiberglass weave. My arms are going to hurt after sanding this.
Everything was going great, and then all of a sudden my compressor head decided to completely lock up -- SOLID! There was oil in it. I have had this compressor for over 10 years and have running it pretty hard, so I cant complain too much. Bought a Vevor compressor head and installed. It doesn't make the air as fast as the Quincy, but is is a lot quieter. If I find that I need more air, I can change the pulleys to increase the speed. I am pretty sure that I am under-spinning the compressor right now. But I really like that it is not so loud.
Sanded down starboard side lower side wall. One more layer on necessary spots. Hopefully this will be the final filler layer before primer. I am just focusing on everything below the rub rail for right now so that I can get it up on the trailer.
Not done with the bottom yet. But I really wanted to get it back onto the trailer.
Inching in the trailer. Having a single axle trailer defiantly made it easier to maneuver.
It is hard to tell in this picture, but I ran into a HUGE problem here. The bunks were set onto the trailer centered on the bunk brackets. That's how it is supposed to be -- Right?
Well, I guess not. The strakes at the front of the hull would be resting directly on the bunk...hmmm. How the heck did it sit before? Never dawned on me to take pictures of below, before I took the boat off of the trailer.
And of course one other problem reared its ugly head. The distance between the top of the fender and the bottom of the boat. Now, I knew ahead of time that the boat is going to overhang over the fenders. That is why I lowered the fenders a couple of inches as well as moved them each out 1.5". Figuring out exactly how far was an educated "guess". I took as many measurements as I could, but without a solid reference point, it was quite challenging. I was close, but the gap ended up being only .75". That was a bit closer that I would prefer. And since I had to re-do the location of the bunks to fit the strakes on the bottom of the hull, time to get creative.

Removed the bunks (with the boat overhanging the trailer fender). Cut redwood blocks to attach to the bottom of the bunks. That did 2 things for me: allowed me to raise the boat up a bit to better clear the fenders, and set them into place in an effort to miss the strakes. Seems simple enough. It took me all day to get it right. I am almost wondering if the bunks should have been 2x4s instead of 2x6s. In either case, I did finally get it set so that it all fits. I may have to do some minor adjustments in the future. Who knows.
About 1.5" of clearance now. Not huge, but I am ok with it. Everything is a compromise. I really don't want the boat any higher.
Looks bigger now that it is sitting up on the trailer.
Pulled the boat out so that I could get the Mercruiser 3.0 up on the engine stand to determine what the condition of the engine is.
Engine at it's resting place for the time being. Time to check it out.
YUCK!!! This was not what I was hoping for. Looks like at some point, one of the past previous owners allowed it to sit out exposed. Water came in through the carburetor into the cylinders.
Time to completely tear everything apart. So to be clear here. I am a pretty decent mechanic. I have been fixing all of my own vehicles for all of my life - couldn't afford to have someone else do it :)
That being said, I have never rebuilt an engine before. I have helped others, assemble one from time to time, but never a full build on my own. Lots of learning gonna be happening here.
Stripped down
The worst cylinder was #4. Used a 3-stone hone. Managed to take .011" out. For those that don't know, that is a HUGE amount to remove with just a hone. In reality, most people would say to take it to a machine shop to have it done. I simply just do not have the money. My time is free. This one cylinder took me 3 hours holding my drill. My arm and drill were not happy with me. I still have a bit more fine work to do to get the proper cross hatch pattern in it.

Well...here comes some bad news. I was successful at removing the indents in the cylinder walls with the 3-stone hone. However, after measuring the bore of the cylinders, and then the piston skirts, I realized that I had a .016" piston to cylinder gap. Spec calls for .0025-.0035. So now I have no choice but to take it to a machine shop to have the block bored .020" over and buy new pistons and rings. I was hoping to just buy new rings. I should have measured the piston clearance on cylinder #4 before working on #3 & #4. Lessons learned...c'est la vie.




.jpg)


